9. Edinn M2 Services
Step 1. Company Creation
In order to install the services, first we need to create a company.
Go to path C:\Program Files (x86)\edinn\edinnM2\Server and execute, with administrator permissions, the program edinnM2_Console.exe (you can copy and paste to your desktop a link to this application as you will use it later, remember to mark it to be executed with administrator permissions).
In the log-in screen, type (do not click login):
- Host:Port: localhost:10000
- Company Id:
(leave this field blank, as you will create the company in the next steps) - User: root
(or the mysql root user that you typed in previous steps, if it is different than 'root') - Password: the mysql password for root that you typed in previous steps.
Do not click login. Instead, click on the "Create" button. This will bring you to the "Register a Company" page inside your server to create your new company. As Payment Code, you can use the default: 1234
WARNING: if you installed the web server in a port different to 80, the 'Create' button will open up a web browser and navigate to an URL which you will have to change, adding the new port where you installed the web server, like this: http://127.0.0.1:NewPortNumber/edinnM2/wiz/register.php?lang=en. However, please do not forget to click on the Create button, as this will perform some needed actions.
Step 2. Edinn M2 Services
Now that you have registered a company in the previous step, in the Windows Explorer, search and execute, with administrator permissions, edinnM2_Console.exe. Log in with the company Id that you obtained in the previous step. Once inside the console, enter the Activity tab. You will see the following:

For each of the 4 services at the left of the window (Central, Monitor, Reports and Supervisor) press "Start service" from top to bottom.
Step 3. (OPTIONAL) Scheduling Backup
NOTE: From version 2021-01, build 504 of the win32 terminal and higher, the backup of the database will be automatically performed by the Optimizer if the 'backups source' field is indicated, which it is indicated by default for companies automatically created with the wizard. Therefore, you do not need to schedule the backup as it is indicated in this step. This step is kept here in case you want to do it manually.
In this step you will configure the database periodical "warm" (without the need to stop the system) backup with MySQL Administrator.
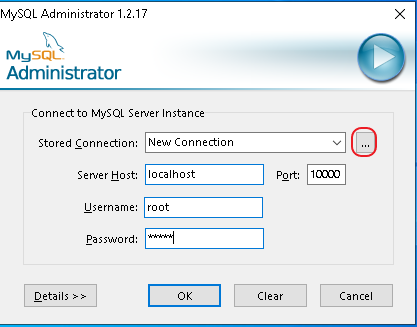
- First of all, you will need to create a database connection. To do this, just follow the steps. Click the marked button.
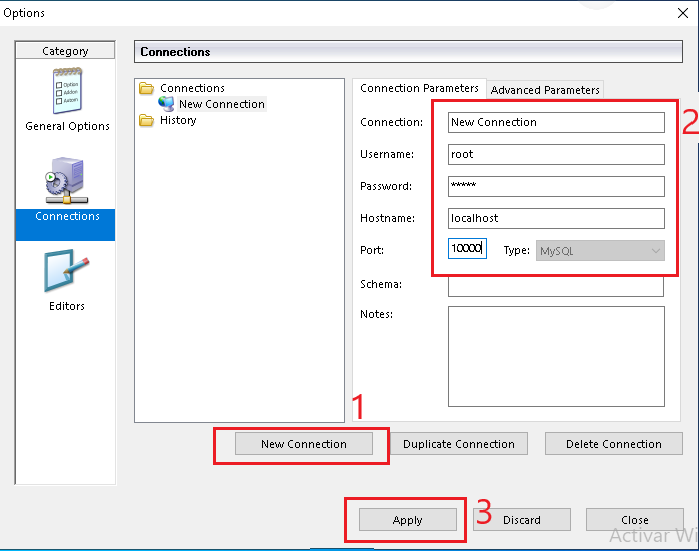
- Click the new connection button, fill the textboxes and Apply.
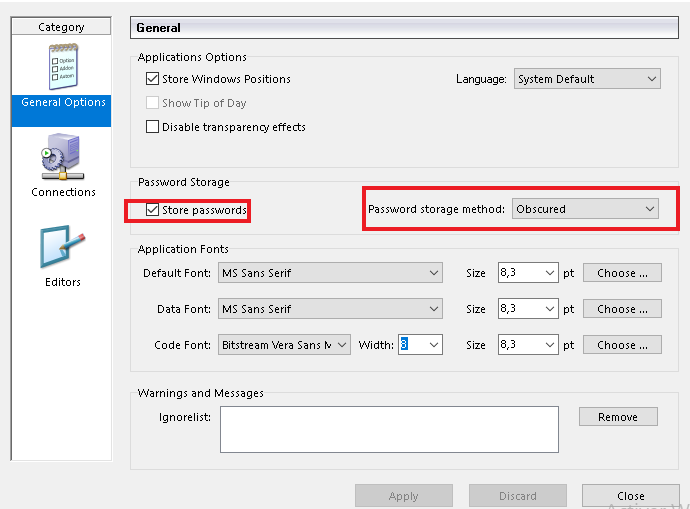
- Go to General Options. In password storage section, check the storage passwords checkbox and select the Obscured option, as shown. Then click Apply.
- In the Windows Explorer search and execute "MySQL Administrator"
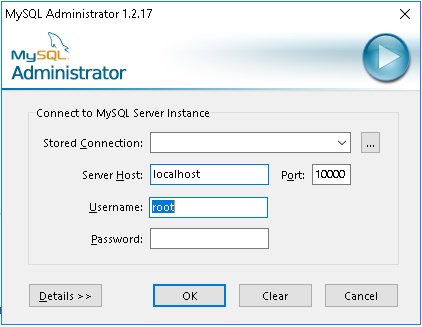
Type user and password that you typed in this step.
- Firstly, enter the Backup tab, click on “New Project”, choose a Project Name and the database on which you are going to configure the backup (usually the name of the company database) and then click the > icon.
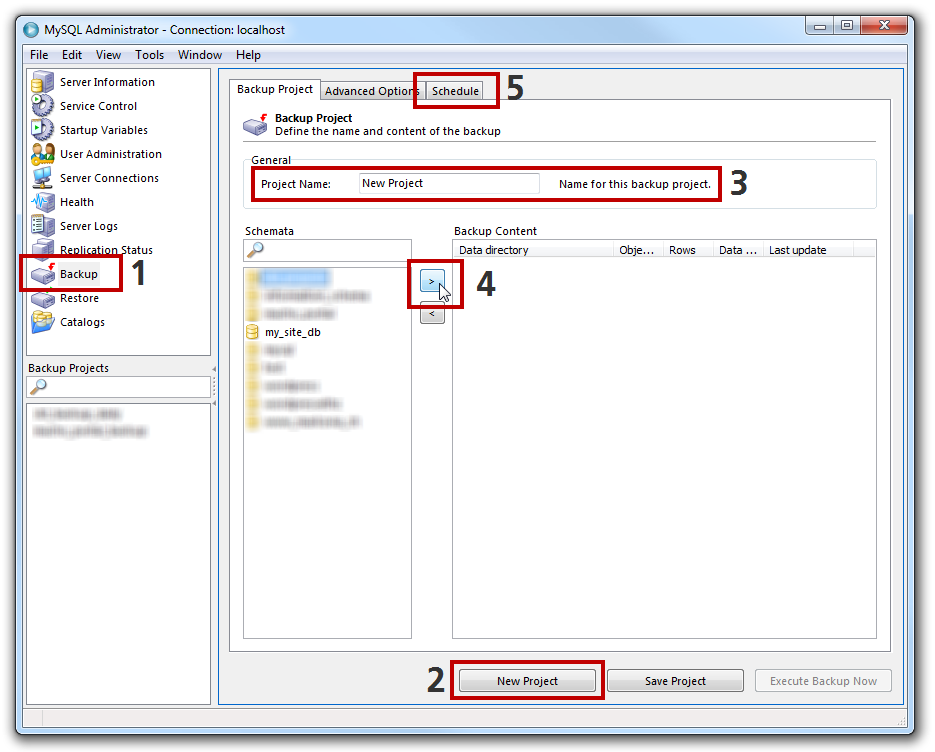
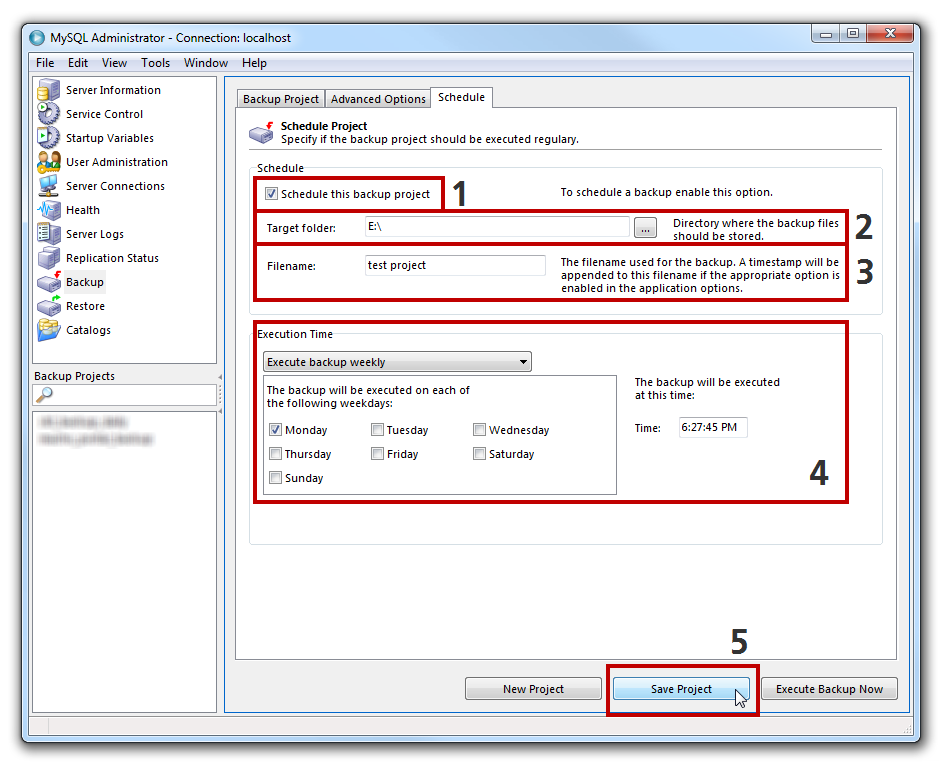
Now enter the Schedule tab inside the Backup tab, here you will configure the following parameters:
NOTE: to Schedule a Backup with MySQLAdministrator, you will need a stored connection. For this, please follow the steps indicated by the MySQLAdministrator application.
- Click on Schedule this backup project.
- Choose the directory where the backup files should be stored.
- Choose the filename used for the backup.
- Choose when the backup will be executed.
- Click on the “Save the project” button.
Step 4. Verifying or adjusting reports parameters
Reports cache might need to convert some reports to PDF format. For that, be sure to have, on the server computer, the "Microsoft Print to PDF" as the default printer. To do that, you can click Windows Start, then type "Control Panel", then search for "Printers", select the printer which converts to PDF (typically "Microsoft Print to PDF"), right button on the mouse and click "Set printer as default".
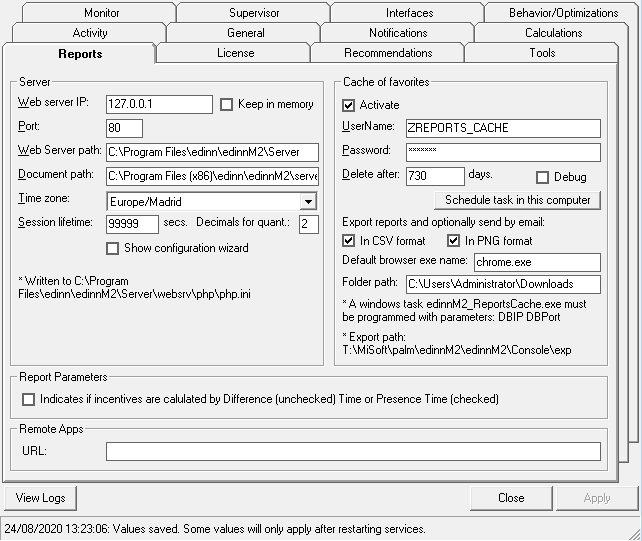
In the Windows Explorer search and execute edinnM2_Console.exe and enter the Reports tab. Configure the parameters of the Reports tab:
- SERVER: here you can configure the IP and other parameters of the server that serves the web server.
- Web server IP: type here the internal IP.
- Port: type here the internal port number.
- Web Server path: the path to the web server. Generally: C:\Program Files (x86)\edinn\edinnM2\Server
- Document path: the path to the documents of the web server. Generally: C:\Program Files (x86)\edinn\edinnM2\Server\websrv\Apache\htdocs
- Time zone: select here the time zone of the server. Once you click on the Apply below, a greyed message should appear indicating that the time zone and other changes were written to the php.ini file. Otherwise, verify that the typed paths are correct.
WARNING: not configuring this Time Zone correctly could lead to serious monitoring problems.
- Session lifetime (secs): seconds of duration of the web server, once passed, the session will expire.
- Decimals for quant.: how many decimals have the quantities of the reports.
- REPORT PARAMETERS:
- Indicates if incentives are calculated by difference (unchecked) Time or Presence Time (checked): by difference, an incentive will be granted to the operator if it exceeds a certain percentage of activity, if it is done by presence time, the incentive will be given depending on the time of presence.
(OPTIONAL) Step 5. Exporting to PNG
If your users need to export favorite reports to PNG:
- Click the button 'Schedule task in this computer'
- Change the automatically generated task which will be in the Windows Task Scheduler:
- To be 'Run only when user is logged on',
- By a user with Administrator permission.
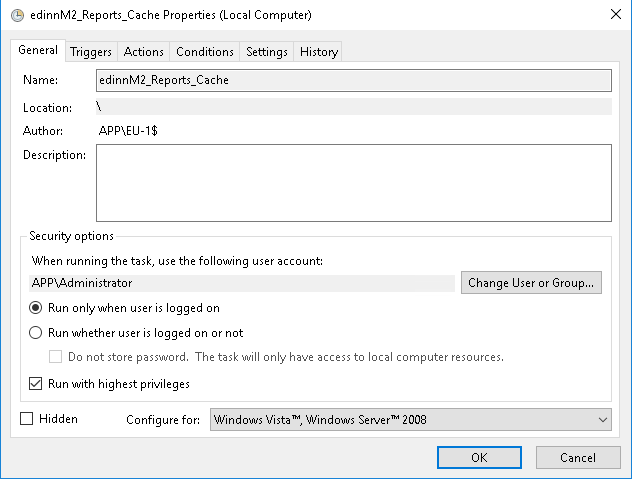
- Remember that this user must have a user session permanently opened in this server computer.