4. MySQL Installer
Please download and install MySQL Installer COMMUNITY from this location:
Location: .\Server\1. New\1. Database\5. MySQLInstaller
Follow the steps:
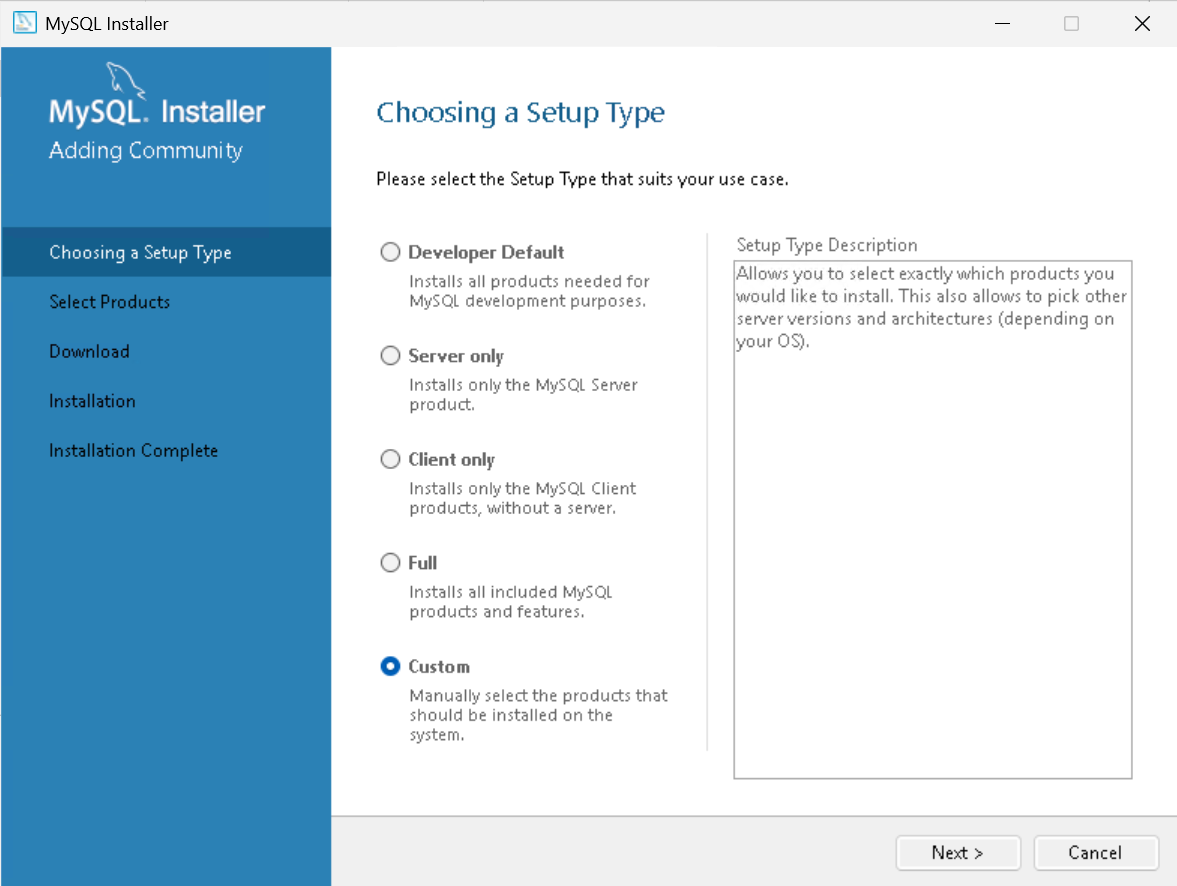
Step 1. Choosing a setup type.
- Check the checkbox for acceptiong the license terms and click "Next".
- Select "Custom" as setup type.
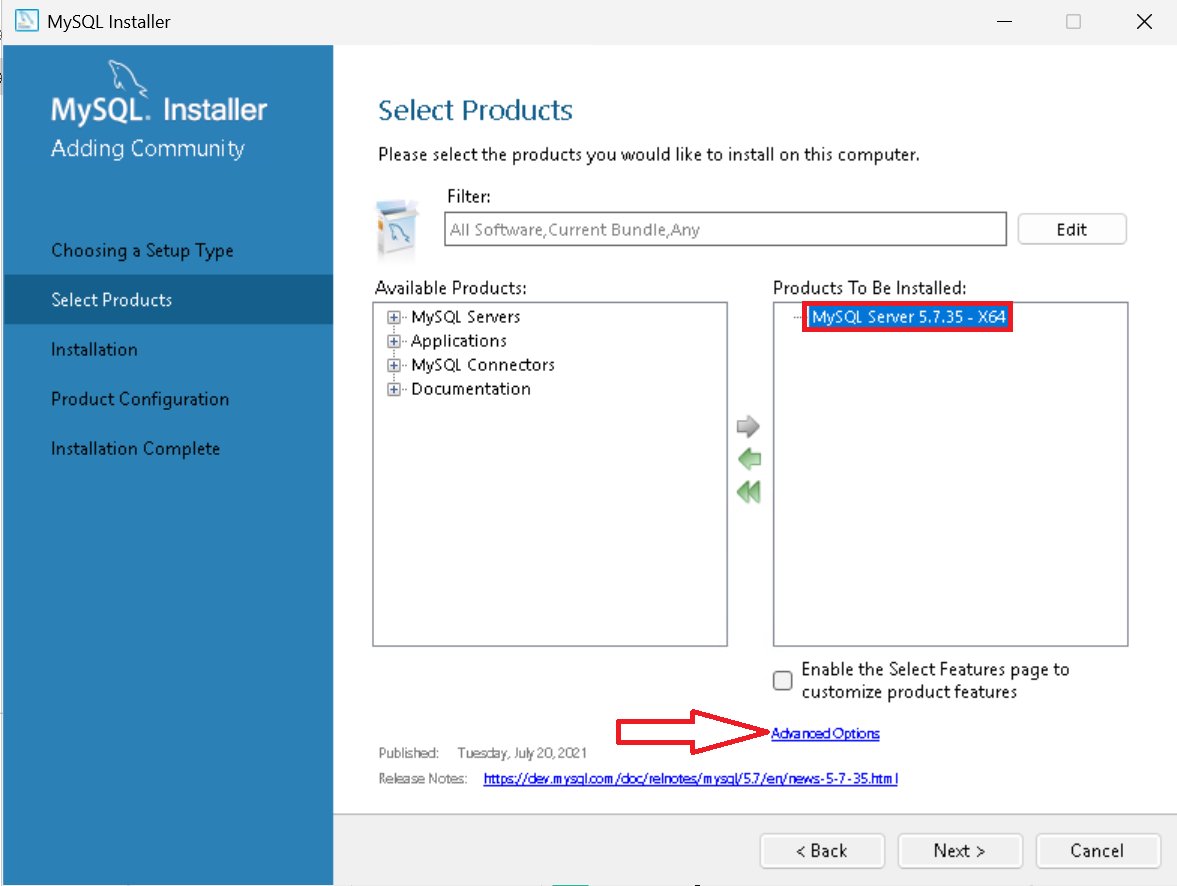
Step 2. Select Products and Features.
1. We are installing only the following:
- MySQL Servers → MySQL Servers → MySQL Server 5.7 → MySQL Server 5.7.35 - X86
2. In the list on the right (Product/Features To Be Installed), select "MySQL Server 5.7.35" and add it to the rightside list by clicking on the green arrow. After it is added to the list, click on it and then click on the link “Advanced Options”, wich you can find at the bottom.
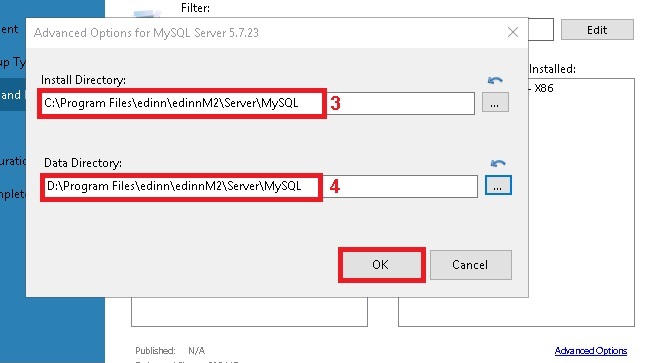
3. In the text boxes "Install Directory" and "Data Directory", type the following path:
C:\Program Files\edinn\edinnM2\Server\MySQL
4. (Optional) In some companies, there may be a dedicated hard disk space to store data (not the C: drive). Determine whether or not it exists, and type it in the "Data Directory" field:
- If the hard disk dedicated for data exists, in the textbox "Data Directory" change the drive letter to that of the dedicated hard disk, for example:
D:\Program Files\edinn\edinnM2\Server\MySQL (or E:\, F:\...) - If the hard disk dedicated for data DOES NOT exist: in the text boxes "Data Directory" leave the C: drive letter.
WARNING: Consider that your system administrator can assign different path for the installation of edinn.
Current screens may differ from these shown above.
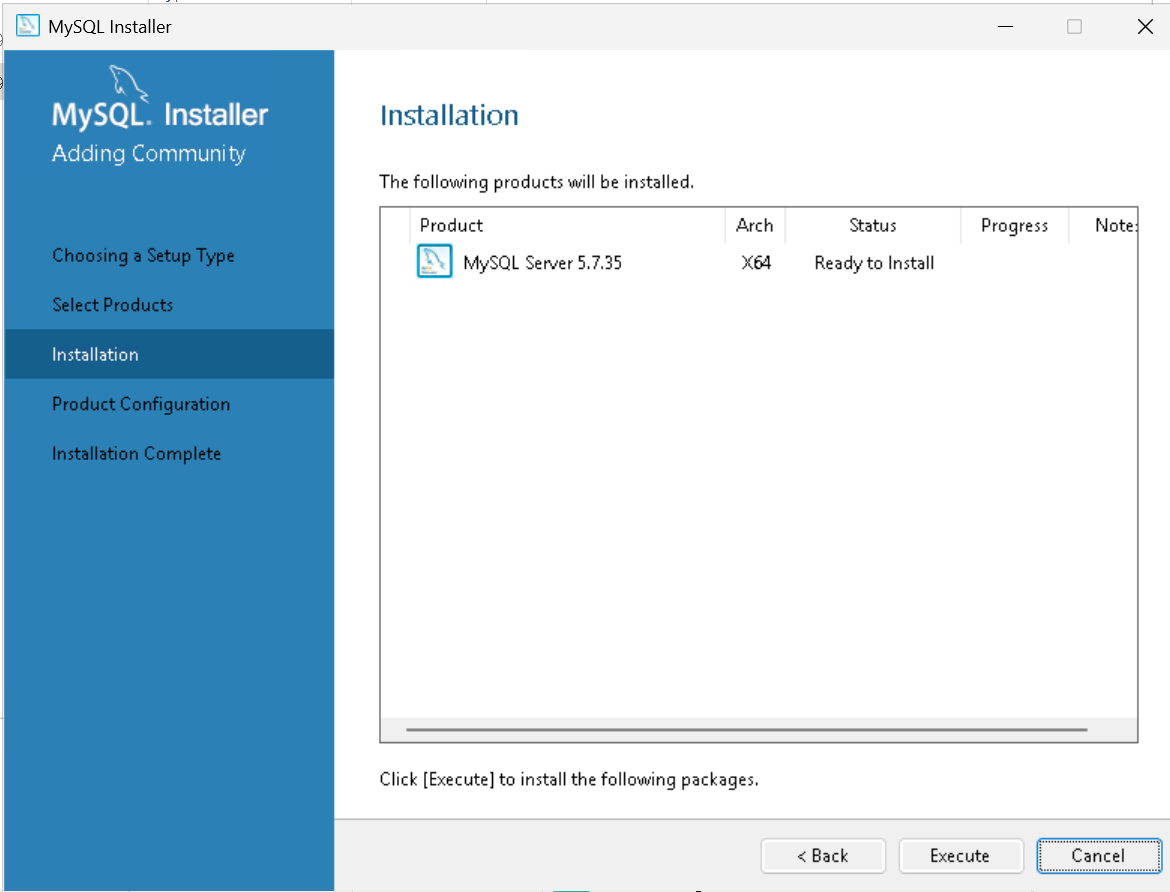
Step 3. Install
After clicking on “Next” button, you will see the following window. Then, you can click on “Execute” button and after a few seconds you will see the window on the left. This means that you have properly installed MySQL and it’s time to configure the service. Click on “Next” button twice.
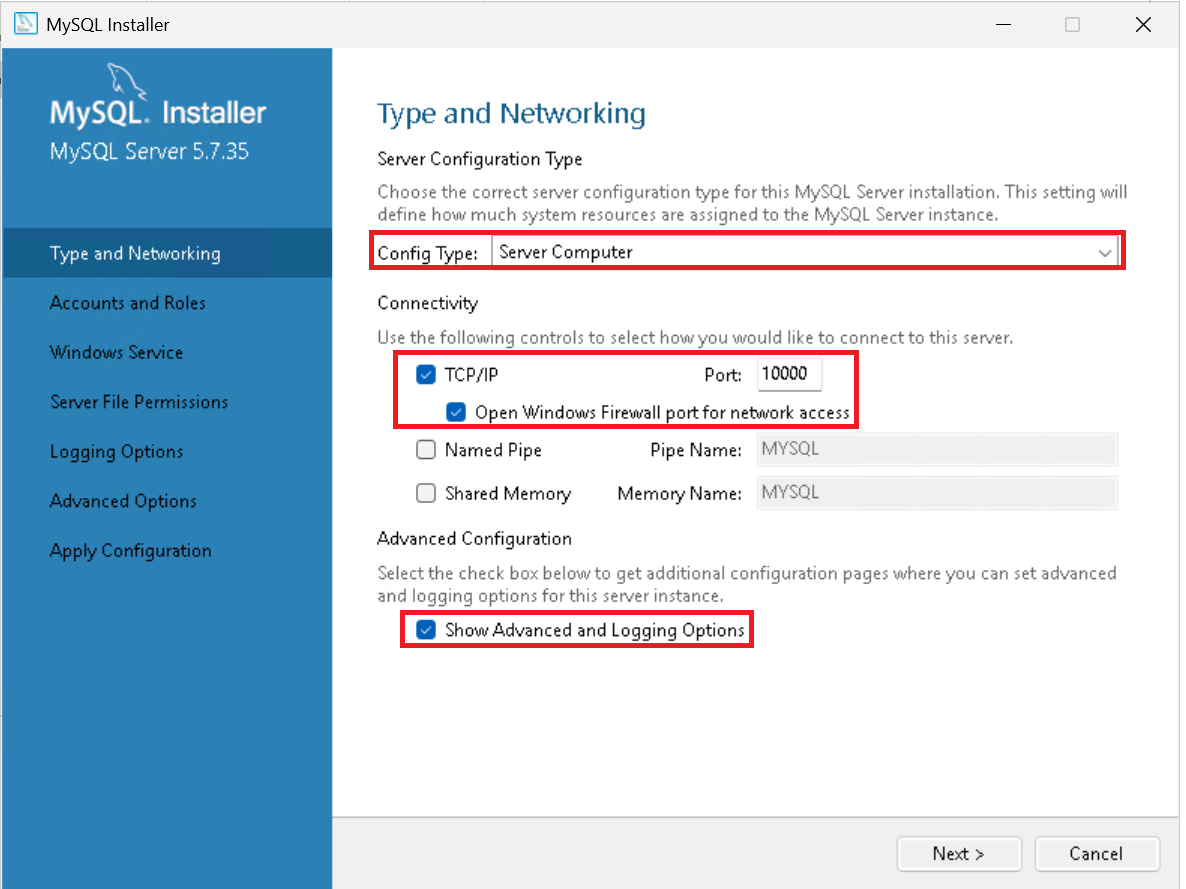
Step 4. Configure Type and Networking
In the window that will appear next fill the following options:
- In the “Config Type” selector, choose “Server Computer”.
- In the “Port Number” text box, type 10000, unless your system administrator reserved this port for another use.
- Check the “Show Advanced and Logging Options” check box and click on the “Next” button
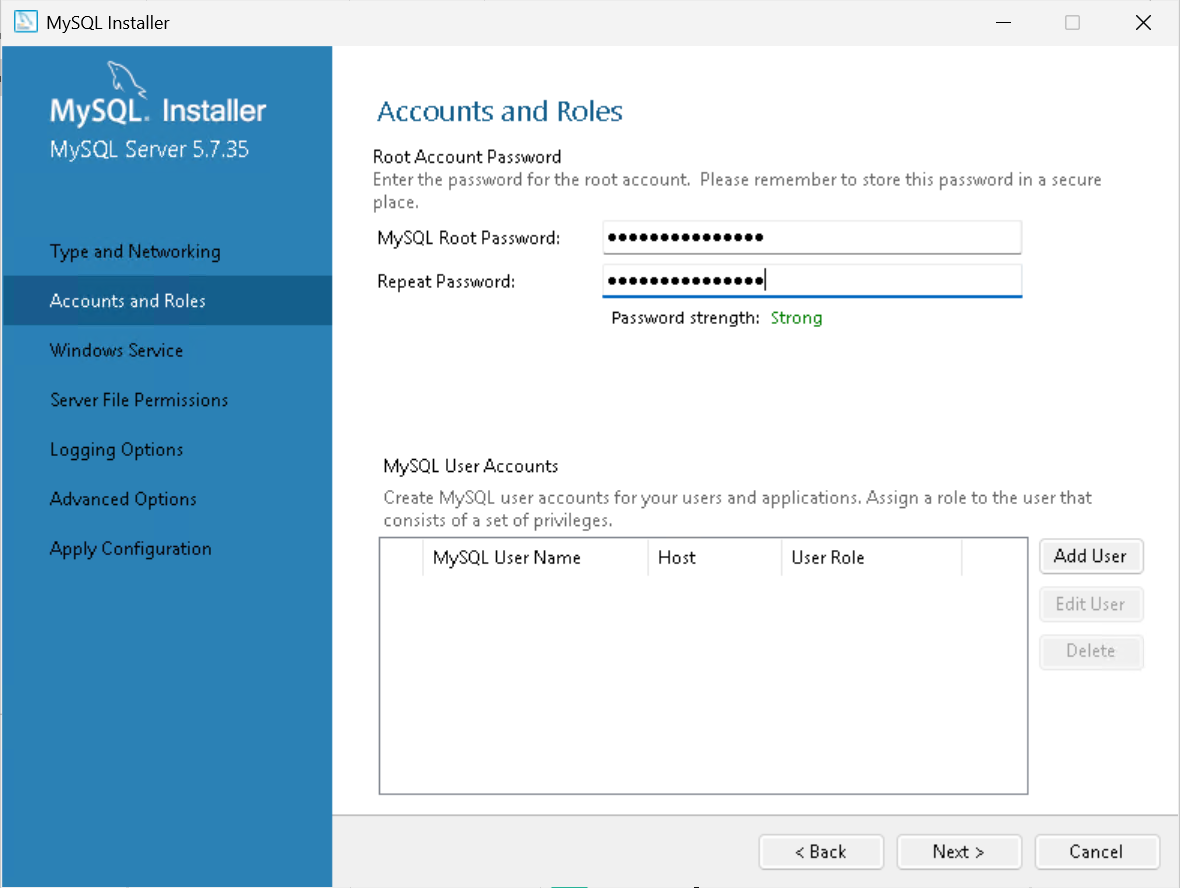
Step 5. Accounts and roles
Here you are requested to write the “root” user password.
At this point you don’t need to add any other user. Click on “Next” button.
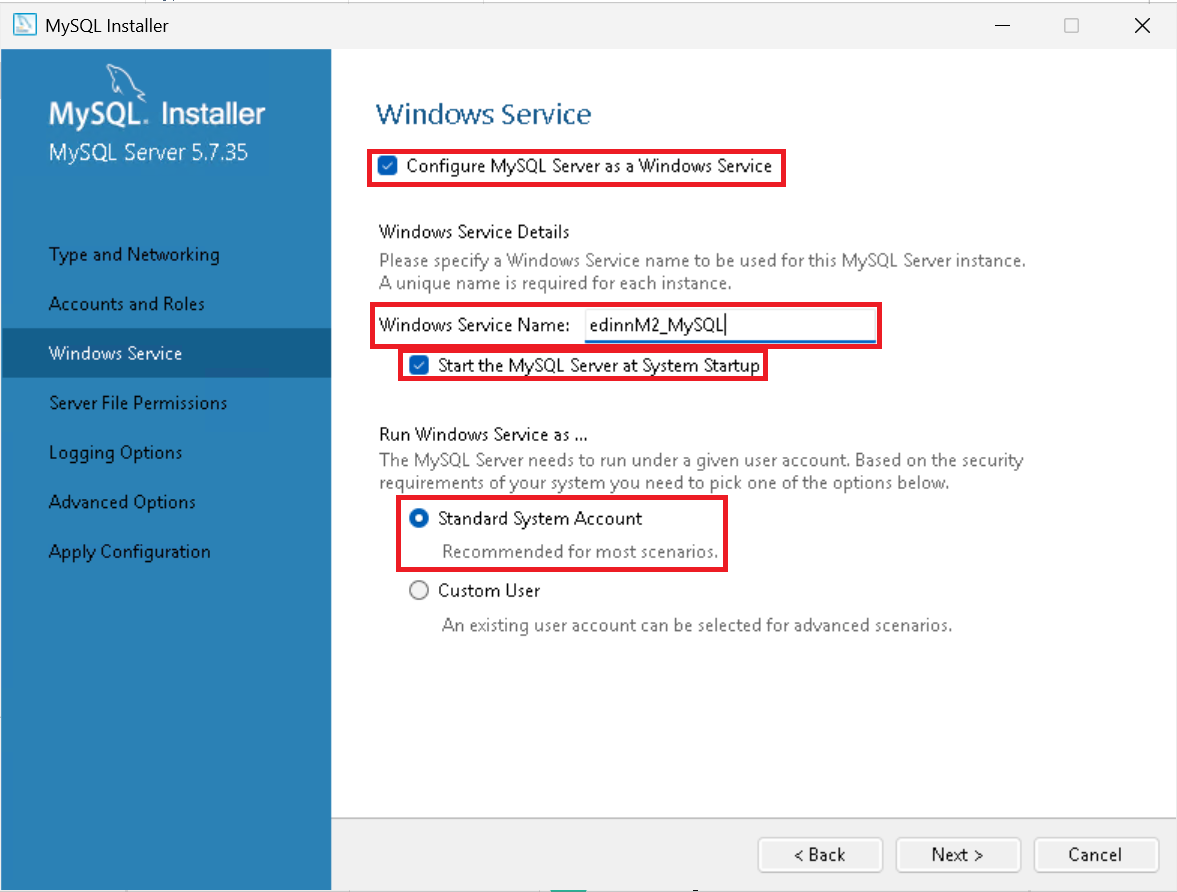
Step 6. Configure Service
In this window you have to configure MySQL as a Windows Service so, fill the following options:
- Check the option "Configure MySQL Server as a Windows Service".
- In the "Windows Service" Name text box type exactly: edinnM2_MySQL
- Check the option "Start the MySQL Server at System Startup"
- In the section "Run Windows Service as…", check the option "Standard System Account", and click on "Next" button.
In the window "Plugins and Extensions" click on "Next" button and go to the following window.
Step 7. Logging options
In the “Logging Options” window, uncheck “General Log”, “Slow Query Log” and “Bin Log”, unless you are using a server replication system, and click on “Next” button.
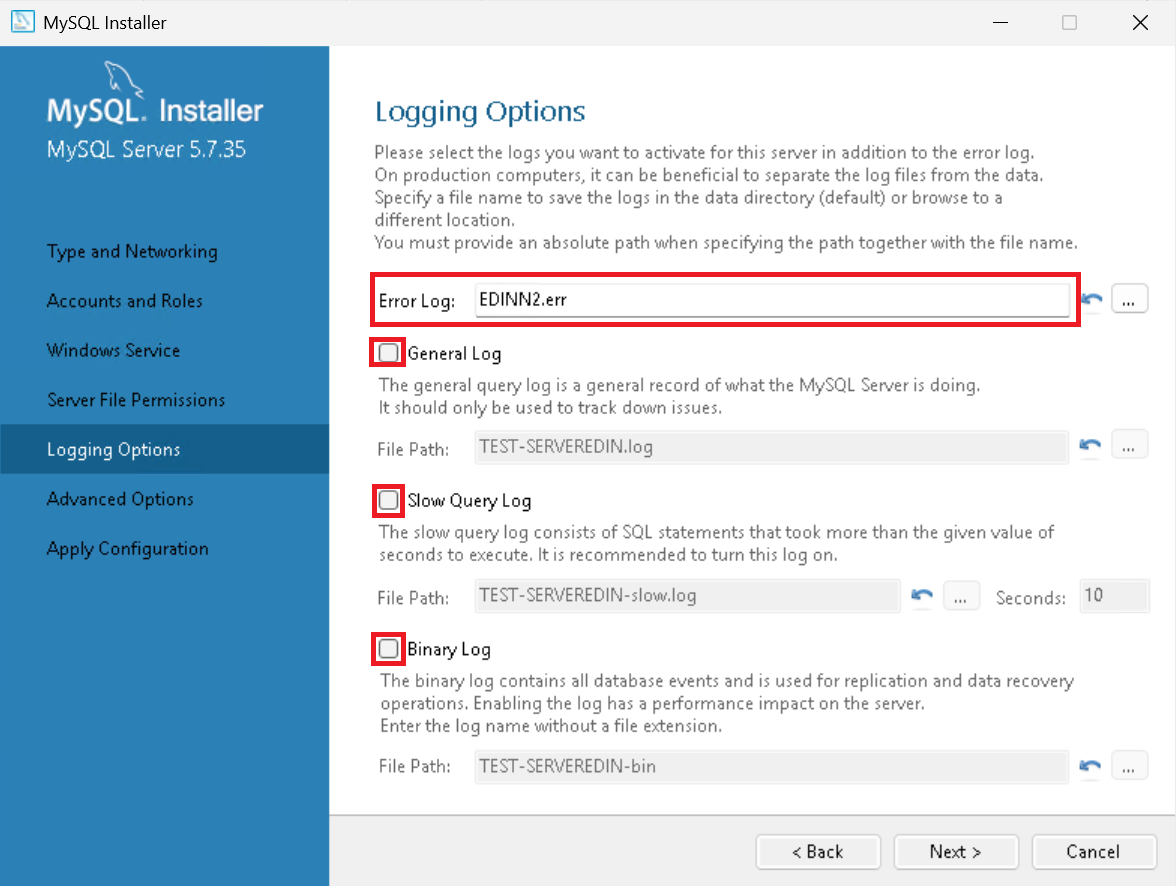
NOTES:
Error Log can have a different name of that shown in image above and this will not cause any problem.
For server replication ask us about specific configuration parameters.
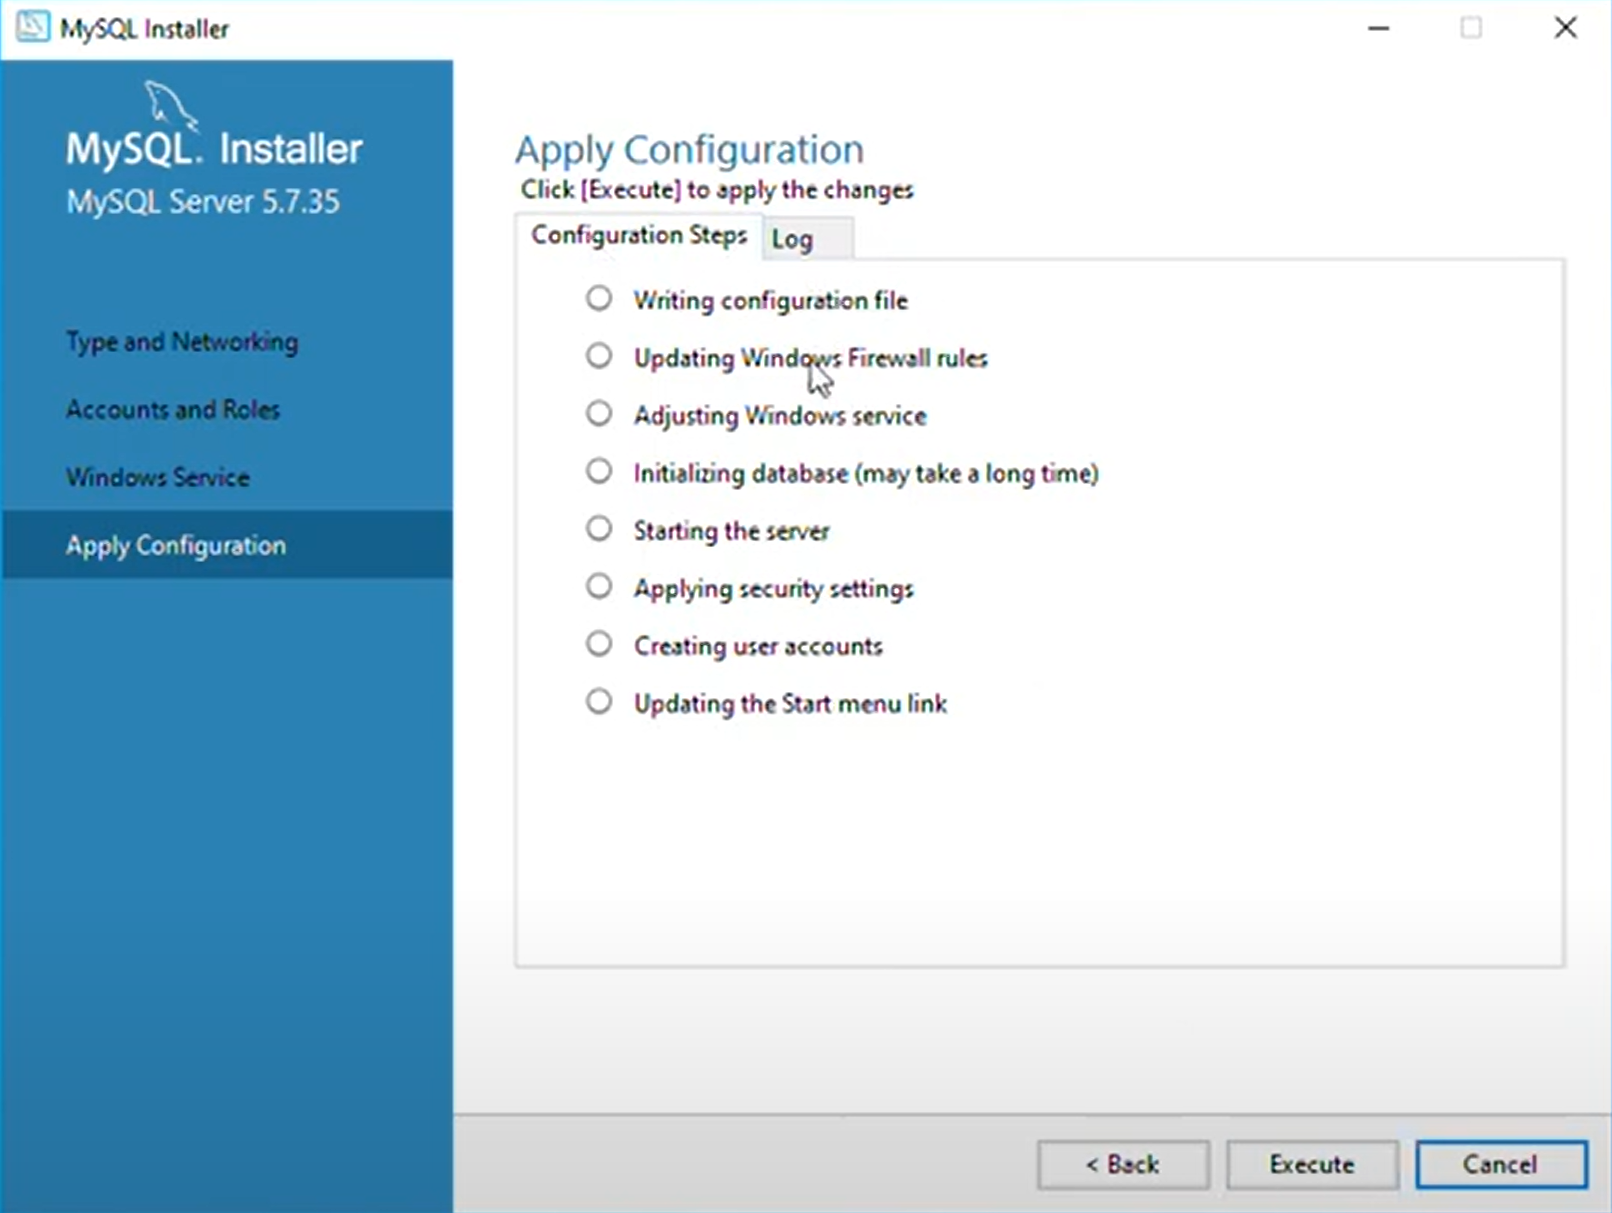
Step 8. Apply Server Configuration
In the window "Advanced Options" click on "Next" button and go to the following window.
To finish the setup process, click on “Execute” button. And on “Finish” button when terminated.
In the following window, click “Next” and, after that, click “Finish” to finish the instalation.
Step 9. Connector ODBC
Please download and install MySQL connector ODBC from this location:
Location: .\Server\1. New\1. Database\5. MySQLInstaller
To install it, run the program, select "Typical" and click next until the program is installed.