Quick guide
In this section we explain how to easily set up your eHUB and get started with the installation of edinn.
- Install the eHUB and the eBOXes:
The eHUB device can be safely installed:
- Either on the plant’s shop floor.
- Or in the plant’s servers’ room.
WARNINGS:
- Both of these options need to ensure a continuous power supply and internet connection.
- The eHUB must always be connected to the same ethernet network as the eBOXes.
- Connect the eHUB device:
- To the power supply.
- To the production data network, where the eBOXes are connected, using an RJ45 cable.
- To the offices data network, where there is internet access, using an RJ45 cable.
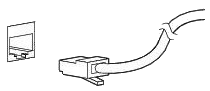
RJ45 cable & socket
NOTES:
- Either connector from the eHUB can be used for the production and the offices data networks.
- For more relevant information on connectivity, please read “Power supply”, “Ethernet Data Network” section here in the Checklist.
- Connect one or more eBOXes: for information on this topic read the Monitoring, Using eBOX help documents.
- Reserve fixed IPs and inform edinn:
- Reserve fixed IPs for each eBOX (sold together with the eHUB or separately).
- Access your account in edinn Support at: https://ecloud.edinn.com/support
- Inform edinn, through the support previously indicated, that the eHUB is ready and provide the list of eBOXes with this information:
- what machine, line or process they are attached to,
- a reserved IP for each one.
You can use the following table as a guide:
Machine/ Line/ Process |
IP |
MACH_01 |
IP_01 |
MACH_02 |
IP_02 |
… |
- Work together with edinn to start and maintain your platform successfully.