Ethernet
NOTE: If you choose full service with an eHUB, you do not have to perform the following steps.
Your eBOX must have an internal fixed IP address and port inside your local network.
Therefore, you need to change the IP address and port of your eBOX to be compatible with your local network.
Edinn works mainly with 2 PLCs in its eBOX:
- Fatek FBs-CBE (From the beginning). It has fixed IP: 192.168.1.3
- Fatek FBs-CBES (Since 2023). Has fixed IP: 192.168.2.3
If you do not know the model of the PLC installed in your eBOX you can check it by opening it. It will appear in a place like the red box in the image below.
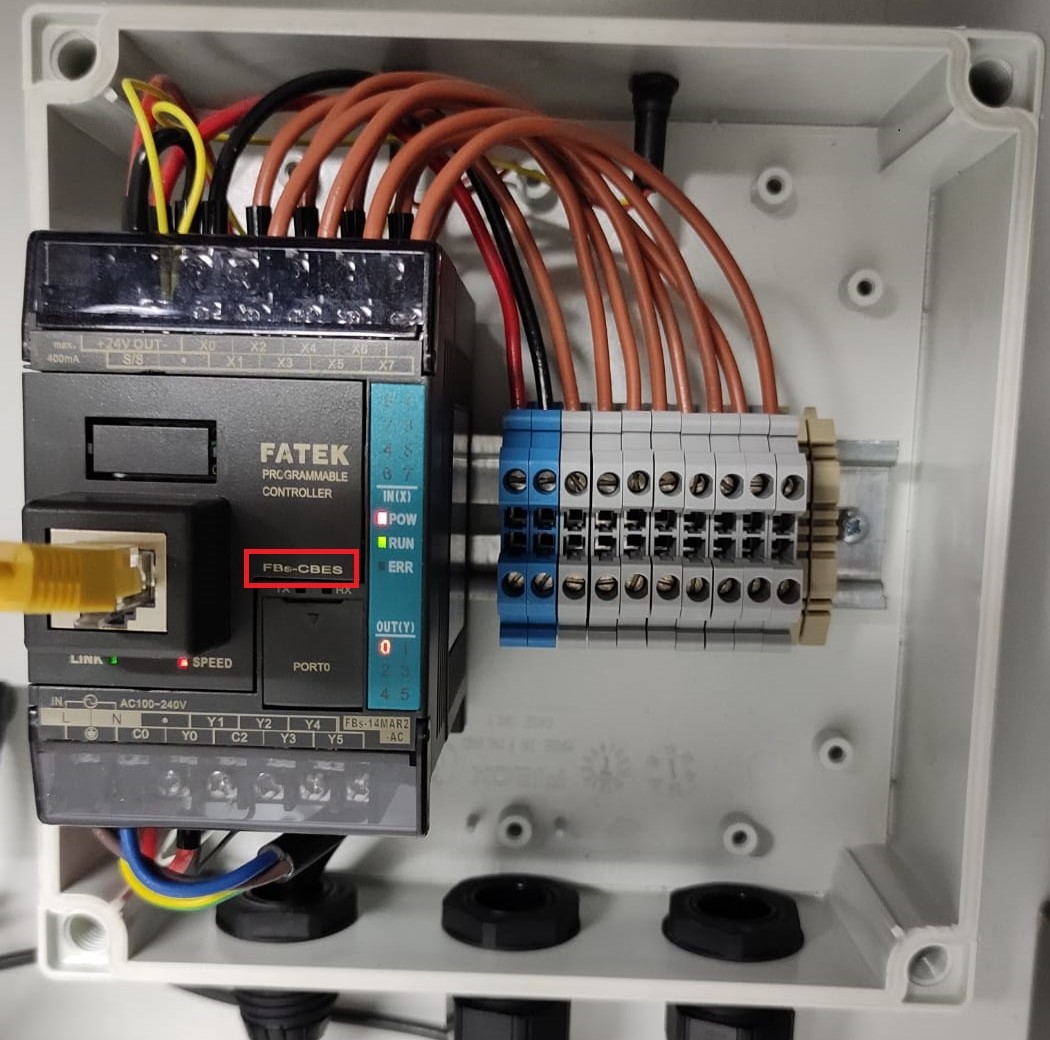
WARNING: This section is written for the old model, the Fatek FBs-CBE. However, for the new model (Fatek FBs-CBES) the process is the same taking into account the default IP (192.168.2.3) of the new PLC instead of the old one (192.168.1.3).
1. IP configuration
Once the connection is done, in order to allow the communication between the PC and the eBOX you should check the PC IP addresses.
- The PC IP has to be 192.168.1.X (Not 192.168.1.3 as it is the eBox IP)
- The Subnet Mask should be 255.255.255.0
- The Default Gateway should be 192.168.1.X (Not 192.168.1.3 as it is the eBox IP)
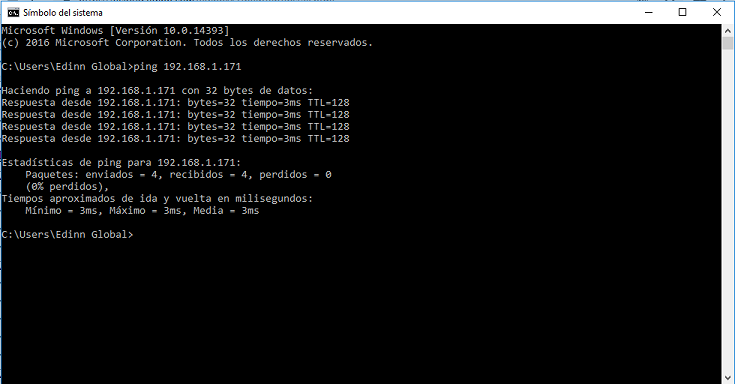
In order to assure that previous steps have been followed and to check the connectivity, follow these steps:
- Windows Start -> Execute cmd.exe
- Write exactly the command: ping 192.168.1.3
- Check that messages indicating that the ping to the ip is succesful
If a host error or a different one appear, it is highly recommended to deactivate Windows Firewall.
If all the previous steps have been followed but an error occurs you can create a ticket to solve your problem.
WARNING: WiFi connection must be deactivated, as it can cause a communication conflict from the PC to other devices.
WARNING: It is very important that the IP address 192.168.1.3 is free in our network, as it is the default one for the eBox.
2. Fatek Ethernet Module Configuration Tool
Downloads can be obtained from the edinn Academy, Iot\eBOX\Ethernet Module Configurator here ![]()
- Download and run with administrator permissions "Ethernet_Configuration_Tool_v5.0.15_installer" to install.
- Search and run with administrator permissions "Ethernet Configuration Tool".
3. eBOX detection in network
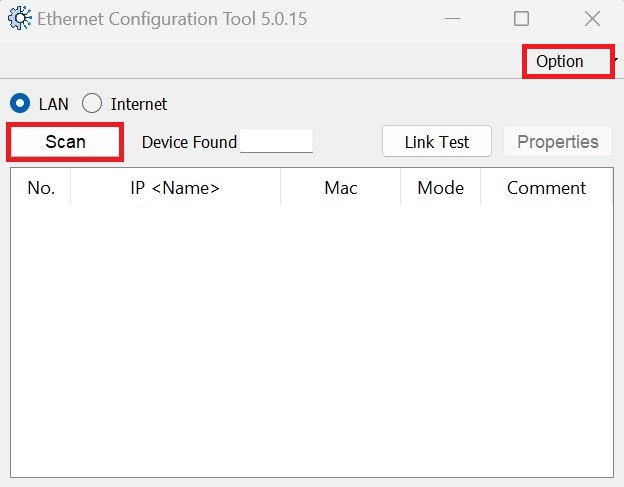
Connect the computer to the network where the eBOX is located in the Option/Select Network drop-down menu.
Choose the LAN option, which detects any eBOX connected to the network the computer is on, and click the Scan button. Note that eBOXes come with 192.168.1.3 as the default IP address, so in order to detect and change the eBOX IP, connect it on a local network with IP range 192.168.1.X, and no other devices on the network with IP address 192.168.1.3.
WARNING: it is advisable to disconnect the computer from any other network, to avoid IP conflicts.
If you can not find the device, it is recommended to check the configuration of the computer IP, check that the PLC lights of the Link flashes on the Ethernet card, check the network cable and that the adapter is correctly installed in the PLC.
4. Select the eBOX
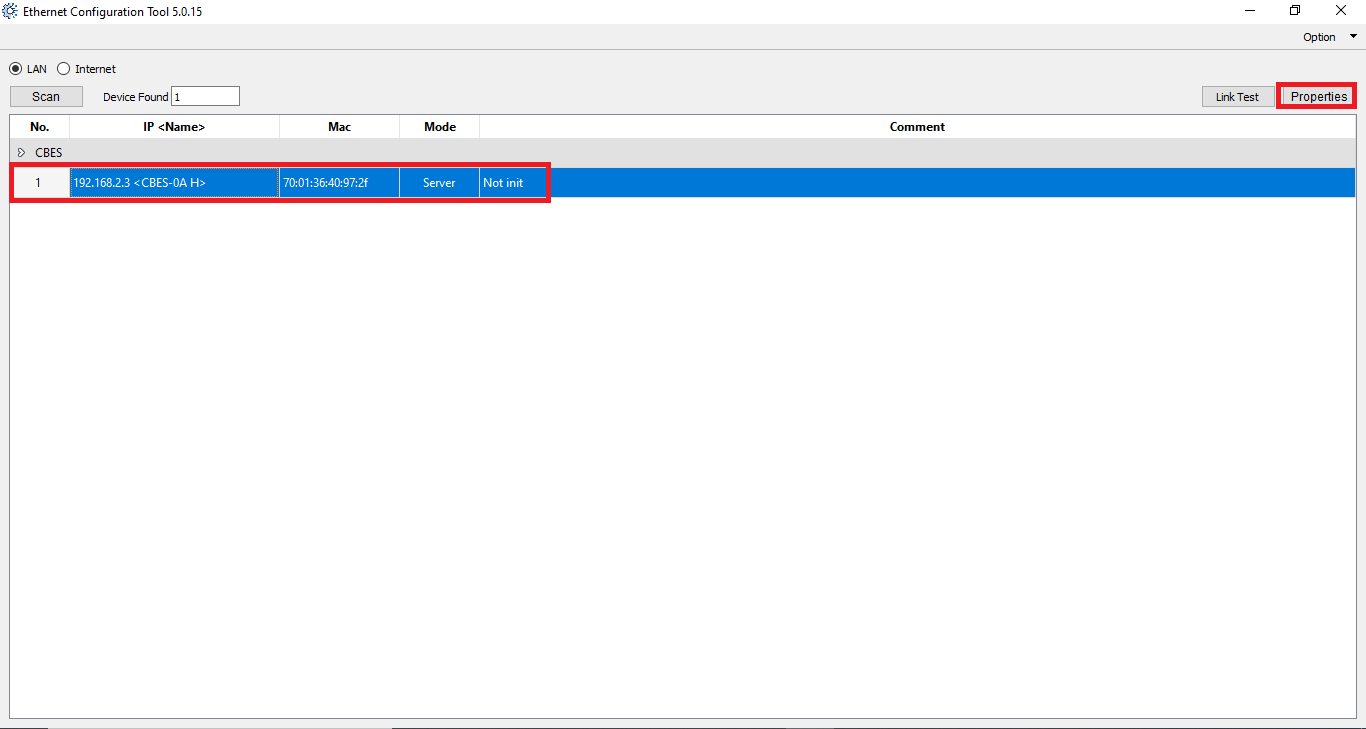
All eBOXs should appear in the list. Choose the one where you want to change the IP address and click the Properties button.
If a password is required, the default value is 1234.
5. Properties

You can change the following 4 fields (check them with your Local Area Network administrator):
- IP Address: where we will change the default IP to the fixed free IP necessary for our installation.
- Subnet Mask number: where we will define the logical division of the IP network in which the PLC is located.
- GateWay: where we will place the default Gateway address for our installation.
- Host Name: where we will define a name to the PLC, for example, the name of the process that it will monitor.
- Comment: if we want to add a comment on the PLC to identify the eBOX in the future.
Once configured, press [Ok] and then [Exit]
WARNING: changing any other parameter may cause the eBOX to NOT WORK and it might need to be sent back to edinn for reparation.
Need help? ![]()